How to Make Yourself Stunning with Digital Retouching in Photoshop

Here is the Photo makeover/ makeup tutorial on the desire of our precious reader Leena. She posted a comment on Create a Charismatic Paint Dispersion Photo Manipulation in Photoshop requesting this tutorial. The kind of photo retouching is very important in the field of Graphic Designing. This retouching forces the designer to use almost all the bitmap tools in software program.
This is one of the few effects which every student of Photoshop dreams to make one day when he or she is entering this field. Getting a clean result of digital retouching is an extremely tough job. Some people use Photoshop only for this purpose of making their pictures more attractive, clean and clear. Hope you all like this tutorial and don’t forget to give some feedback. Too much talk, let’s take a look on the tutorial now.
Before we go further remember to Subscribe to ourFree Rss Feed or Follow us on
Twitter to stay updated with our postings
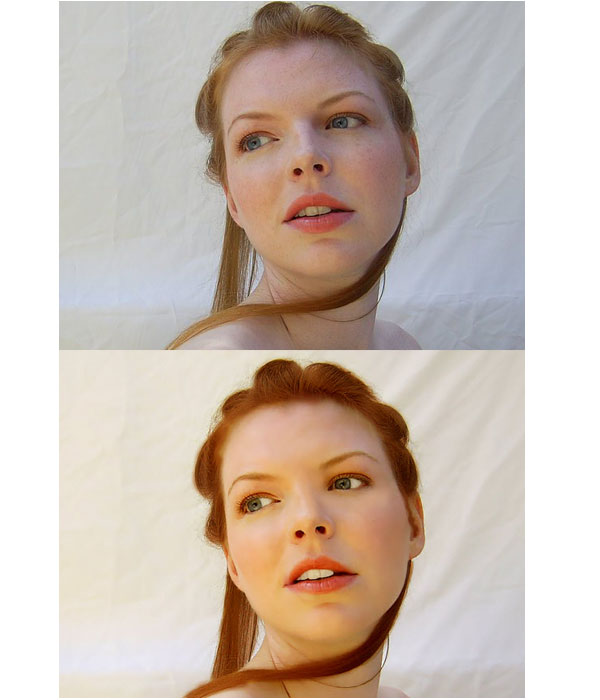
Final Difference
Download Source File
Skin

Model
Let’s start by adjusting the curves of the image of the model by pressing CTRL+M.

Now we are adjusting Color Balance. You can see the values I used for Midtones and Highlights by pressingCTRL+B.


Levels are up next. You can see the Levels dialog box by pressing the CTRL+L.

I selected Patch Tool for removing spots (pimples, dark areas etc.).

I applied the filter of the Blur from Filter>Blur>Surface Blur. Remember, before applying this filter, make a duplicate layer of the model by striking the CTRL+J, then apply the filter. This will add a diffusion effect that will pull away all the negatives from the skin.
Trick
When we blur the image, eyes, mouth and hair also get blurred and that looks unreal. And that is why we made the duplicate layer. Just erase these areas (eyes, hair, lips etc.) and you’ll get a gorgeous result from the duplicated layer below.

Hair
I made a new color layer for improving the hair color.

I changed the Layer style to the Multiply and Opacity to 89. You should of course test the result with your values.

Eyes and Teeth
Here I Adjust the eye color by painting over the eyeballs on a new layer.
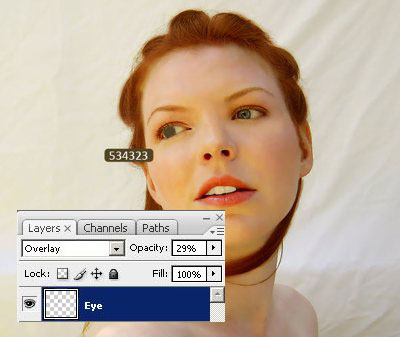
Whitening the area around the eyeballs wouldn’t be a bad idea.

The result up there may seem too sharp but it’ll get better. Now let’s adjust the teeth color in the same manner and set Opacity to 41.

Lips
I applied the Liquify filter with these Adjustments for balancing the Size of Lips.

Applying the Liquify filter.

FINAL RESULT

DIFFERENCE
Download Source File
Follow Designzzz on Facebook
Tags: Photoshop Tutorial
 Previous Article


