How To Design a Thanksgiving Pumpkin in Photoshop
http://cs5tutorial.net/how-to-design-a-thanksgiving-pumpkin-in-photoshop/


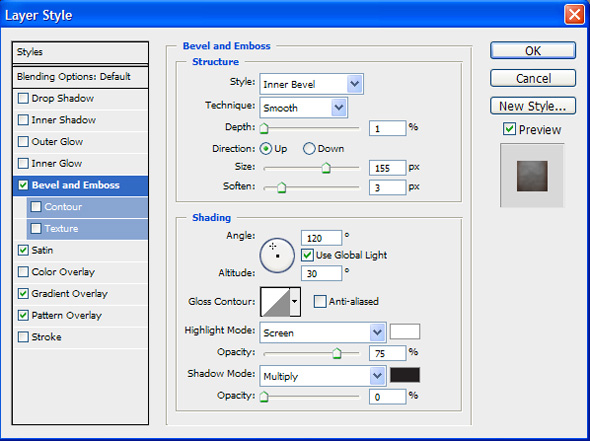
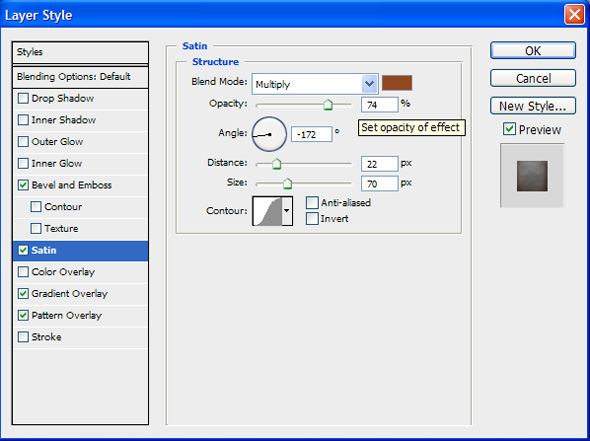
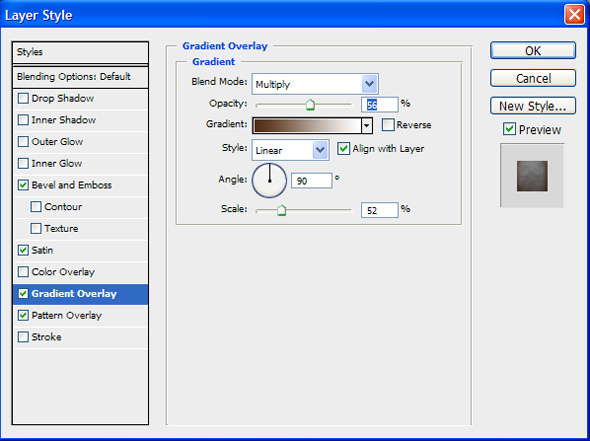
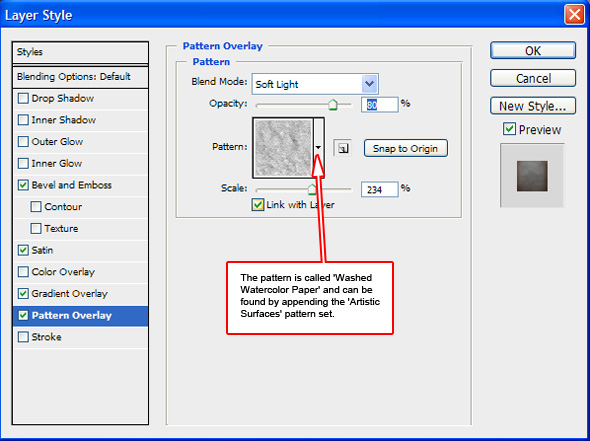
 Double click the ‘Pumpkin’ Layer to bring up the ‘Layer Styles’ panel and add the following effects:
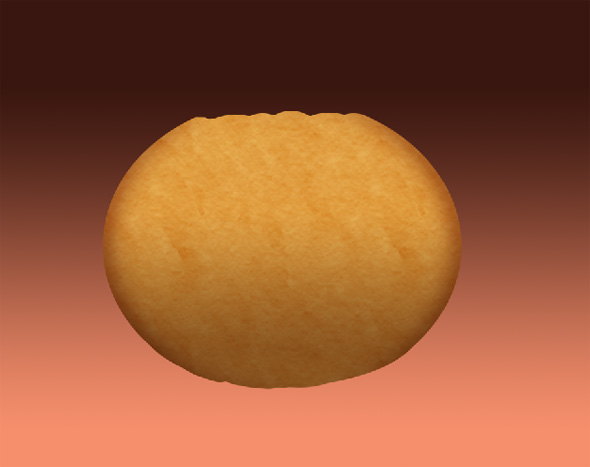
 The result should resemble the following:
 Your image should resemble the following:


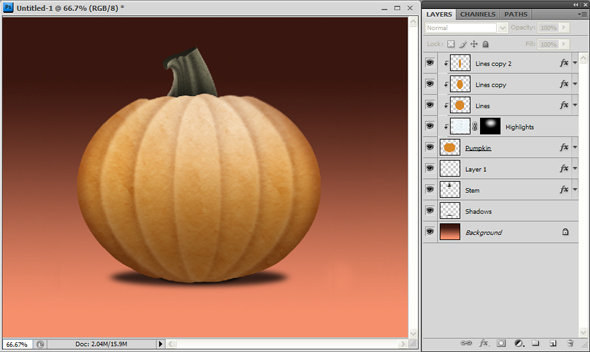
 Your image should look like this:
 Your image should look like this:
 Give this layer a Gaussian Blur
Your image should look like this:
 Select both ‘Stem’ layers and press Cmd/Ctrl+E to merge.

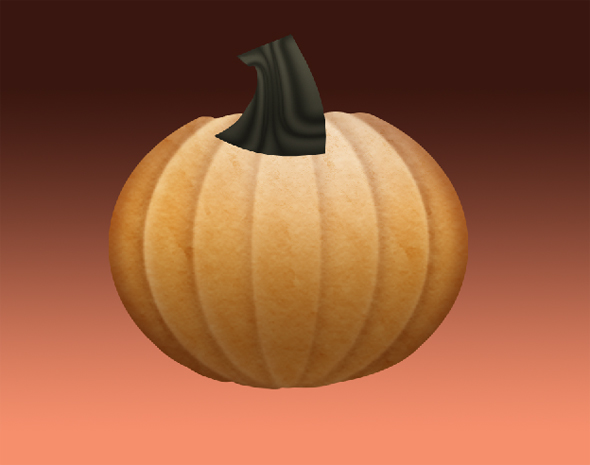
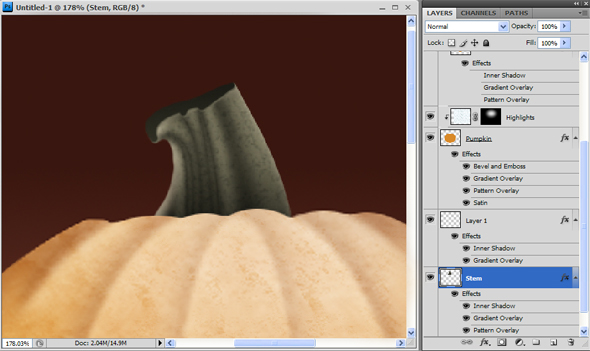
 Your finished stem should resemble this:
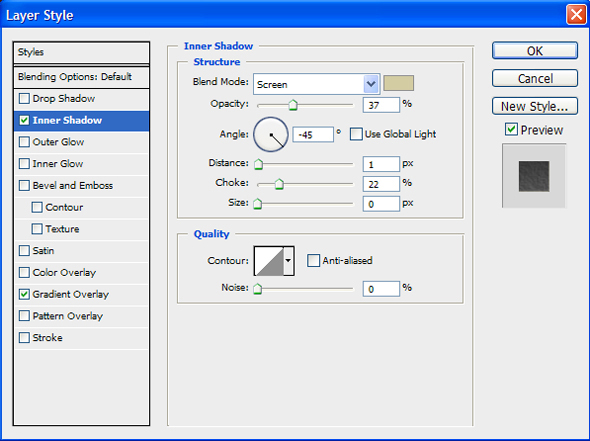
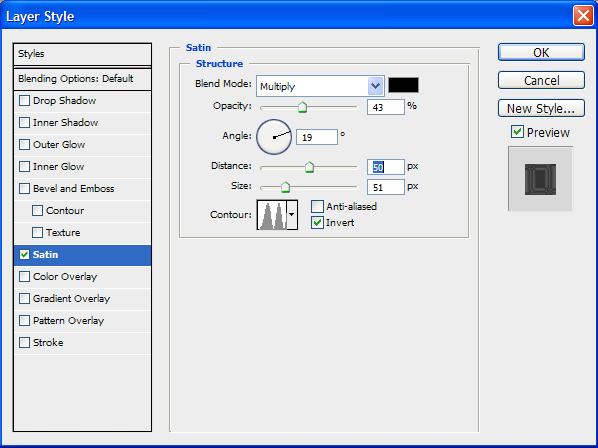
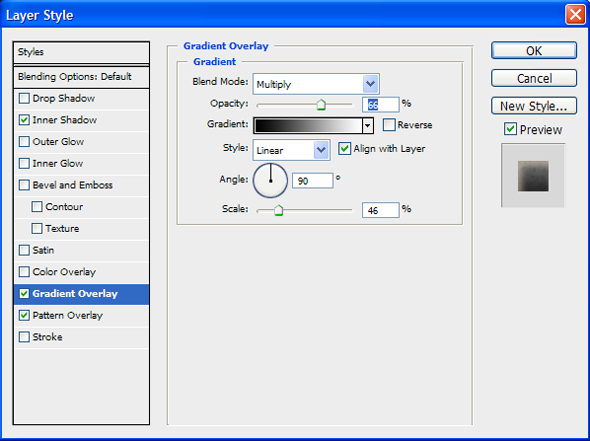
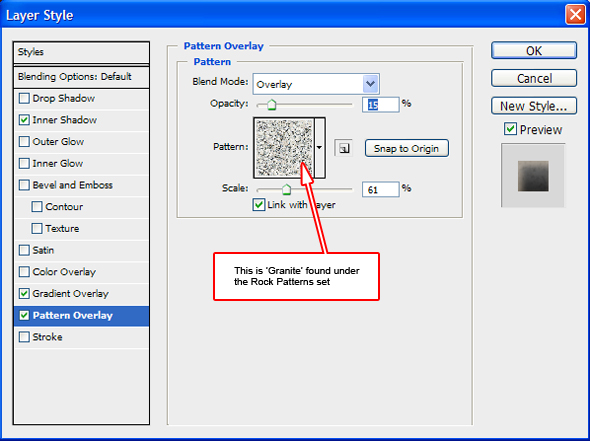
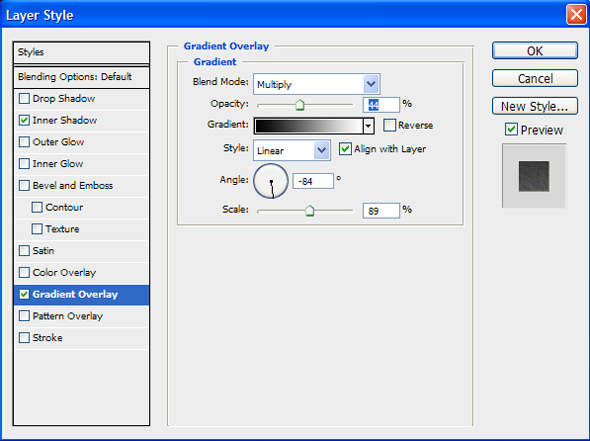 On the ‘Stem’ layer, use the following effects:

 When your done, go ahead and move both stem layers below the pumpkin (just above the ‘Background’ layer). Your image should resemble this:
 Fill this selection with black and give it a blur.
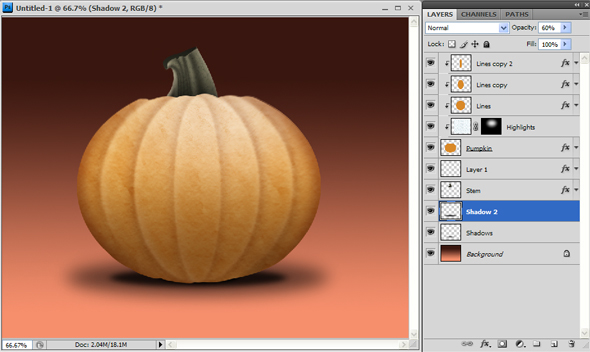
 If you want, you can add another shadow that’s larger and has more blur. Here is an example:
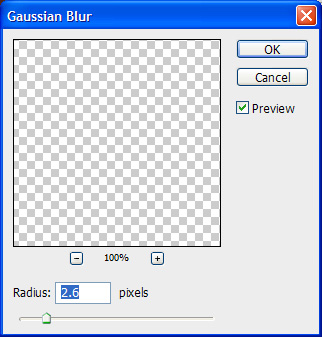
 Delete the selection and give the layer a Gaussian Blur. This will add a nice depth-of-field effect to our image:
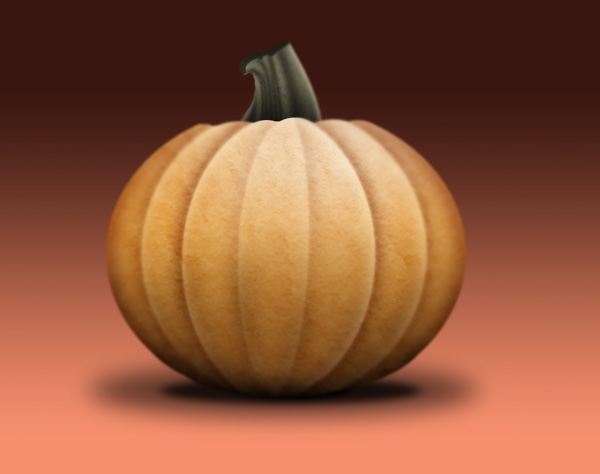
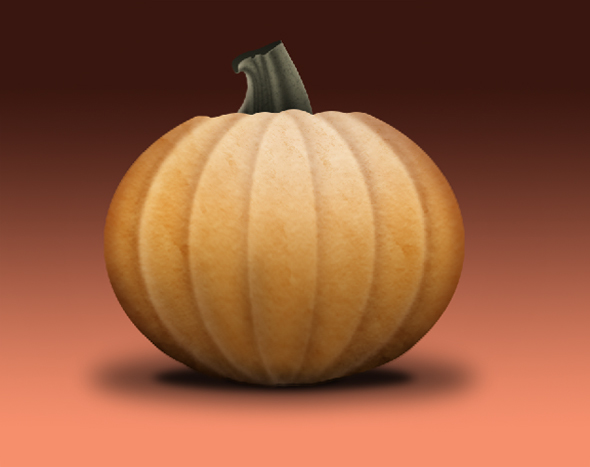
The Final Image
This is what we will be creating:Step 1: Setting Up the Document
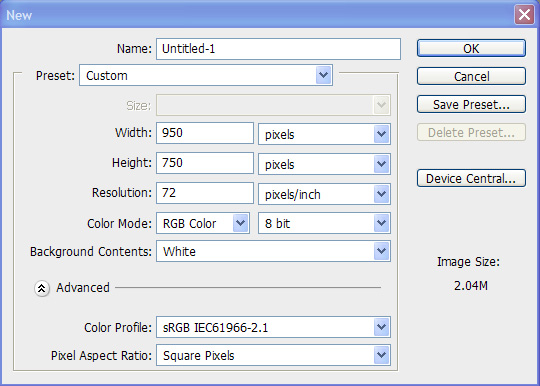
Start by creating a new document (File>New) that is 950×750 pixels (72 dpi)Step 2: Adding a Background
Fill the background with a gradient. I used the colors: #39160f and #f68f6cStep 3: Starting the Pumpkin
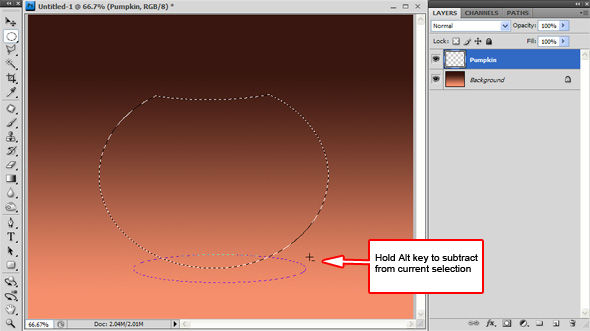
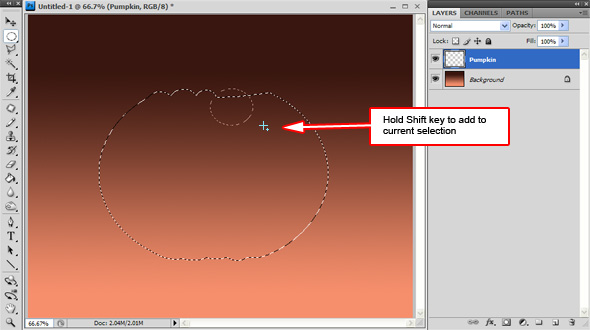
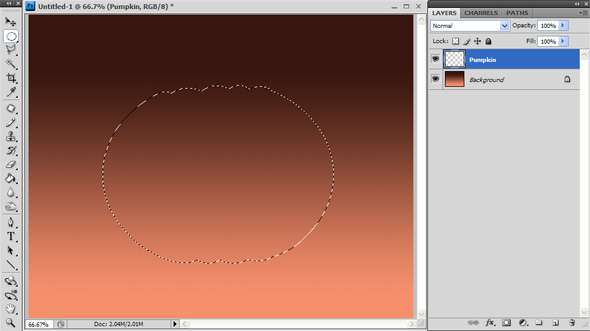
Create a new layer and call it ‘Pumpkin’. Use the Elliptical Marquee Tool to make an oval selection. The idea is to make the general shape of the pumpkin.Step 4: Defining the Selection
With the selection still active, hold shift or opt/alt to add or subtract from the top and bottom of the selection. You want to use these tools to shape the pumpkin. Use the images below to help you through this processFine-tuning your selections
To get those exact placements with the selection tools, try holding down the Spacebar while making a selection.Step 5: Defining the Pumpkin
Fill the selection with a nice orange color.Step 6: Adding Highlights
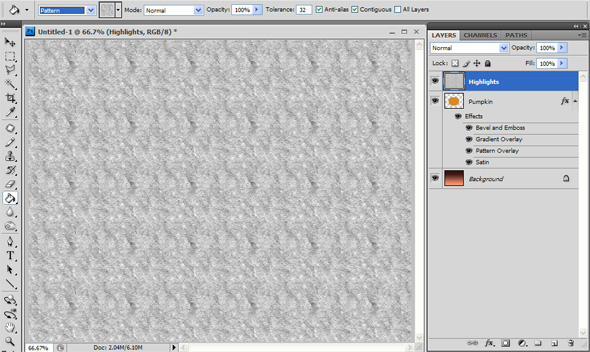
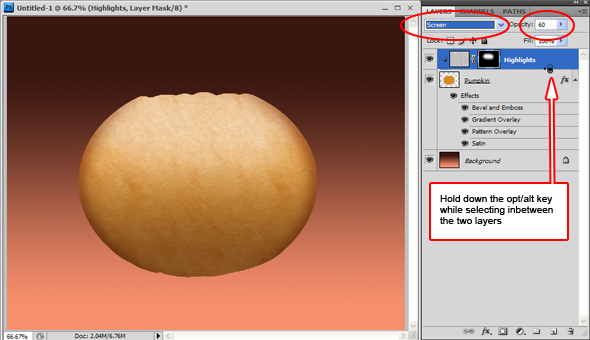
Create a new layer and name it ‘Highlights’. Select the Paint Bucket tool and fill this layer with the ‘Washed Watercolor paper’ pattern. You can do this in the top toolbar by selecting ‘Pattern’ in the drop down, and then selecting the pattern’s thumbnail in the second drop down.Step 7: Still Adding Highlights
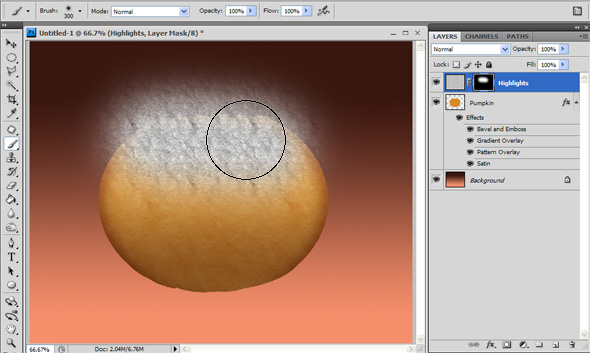
Select the ‘Add Layer Mask’ at the bottom of the layers panel and press Cmd/Ctrl+i to invert the mask.Step 8: Painting Highlights
Use a large brush with a 0% hardness set to the color white and paint in some highlights. Don’t worry about going outside of the pumpkinStep 9: Finishing the Highlights
Set the layer’s opacity to 65% and make this layer a clipping layer by holding down the opt/alt key and selecting in-between the two layersStep 10: Adding a New Clipping Layer
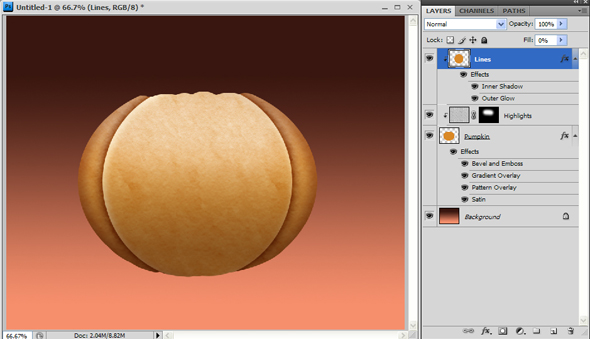
Holding down the Cmd/Ctrl key, select the ‘Create a new Layer’ Icon. Name it ‘Lines’Mac vs. PC
By creating a new layer with the above method, a Mac will place the new clipping layer above the previous one, while a PC will place it below. Make sure the new layer is at the top of the stack.Step 11: Following the Contours
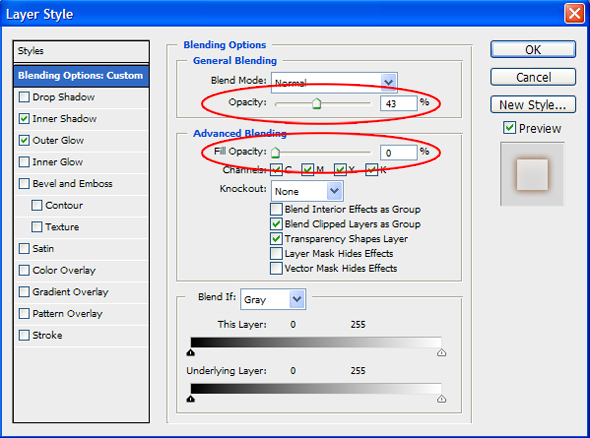
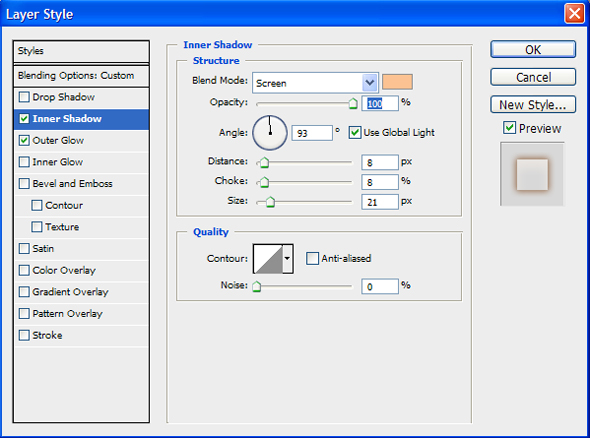
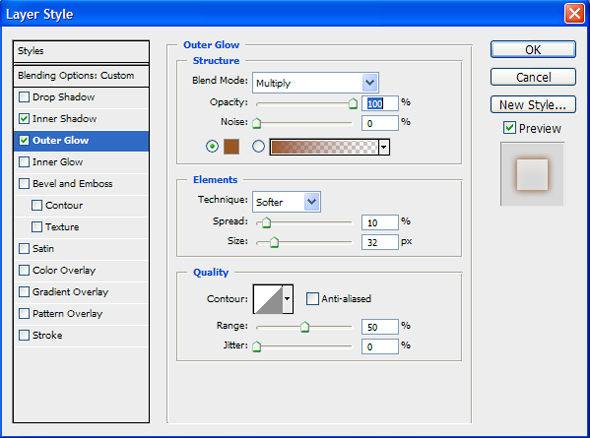
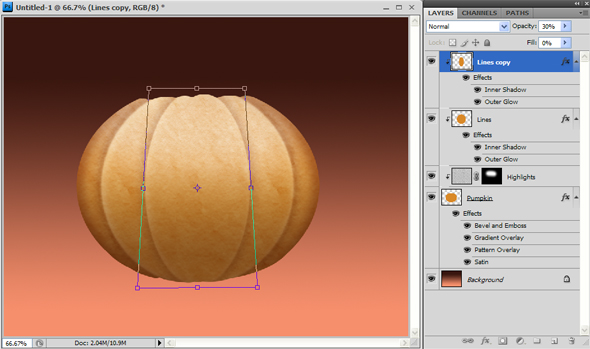
Use the Elliptical Marquee tool and try to make a selection on the pumpkin that would follow the natural contours. Use the image below as a guide:Step 12: Defining the Contours
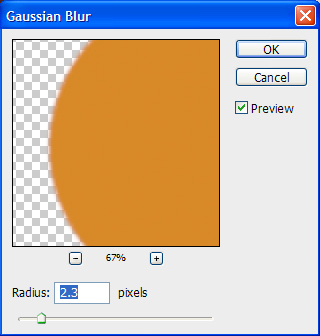
Fill the selection with any color (it doesn’t matter what color) and give it the following effects:Step 13: Blurring the Lines
Give this layer a Gaussian Blur (Filter>Blur>Gaussian Blur)Step 14: Copying Layers
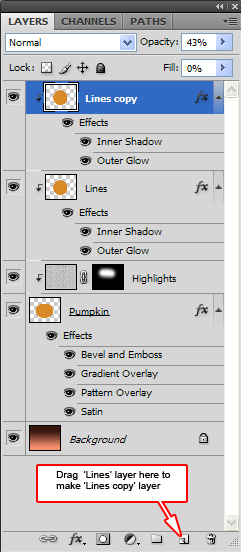
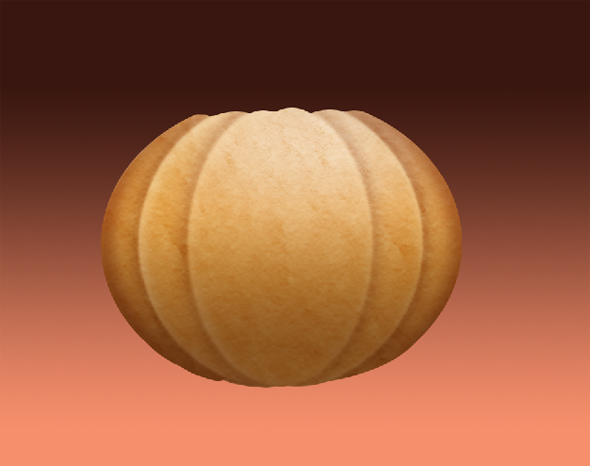
Copy this layer by dragging it from the layers panel into the ‘Create a new Layer’ icon. This will make a duplicate layer, preserving effects and clipping.Step 15: Adding More Contours
Adjust this layer’s opacity to 30% and transform (Cmd/Ctrl+T) this layer to add a new set of ‘lines’ to the pumpkin.Repeat Effect
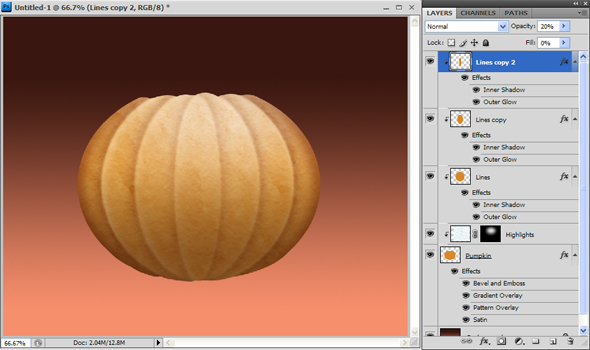
Instead of going back through the filters menu, simply press Cmd/Ctrl+F to apply the last Filter used—which, in this case, was the Gaussian blur filterStep 16: Doing all again
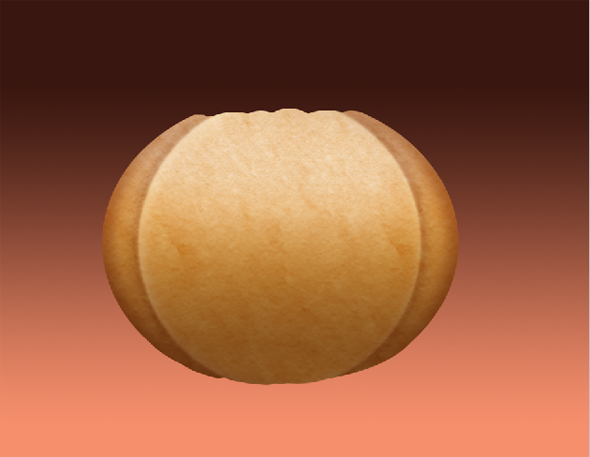
Copy, transform, and blur the layer again. Set the opacity to 20% . Your pumpkin should resemble this:Step 17: Creating a Stem
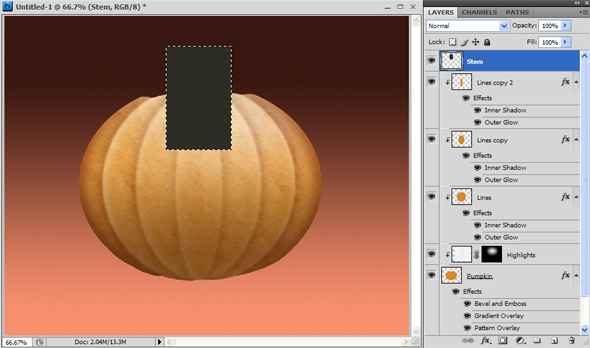
Create a new layer and name it ‘Stem’. Using the Rectangle Marquee tool, create a rectangle and fill it with a dark olive color.Step 18: Defining the Stem
Give the layer ‘Stem’ the following effect:Step 19: Merging the Effect
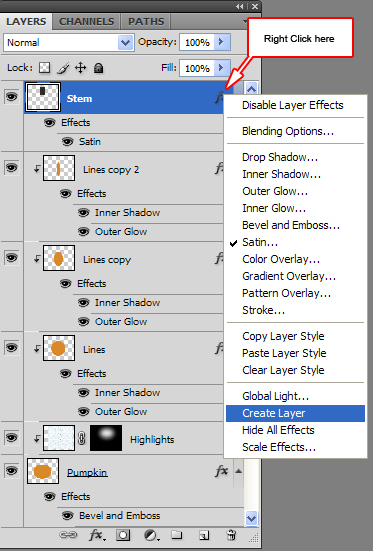
Right click the fx icon in the ‘Stem’ layer and select ‘create layer’. This will expand the effect on to its own layerPay Attention!
Just a reminder to make sure that the ‘Stem’ layer is not a clipping layer.Step 20: Warping Fun
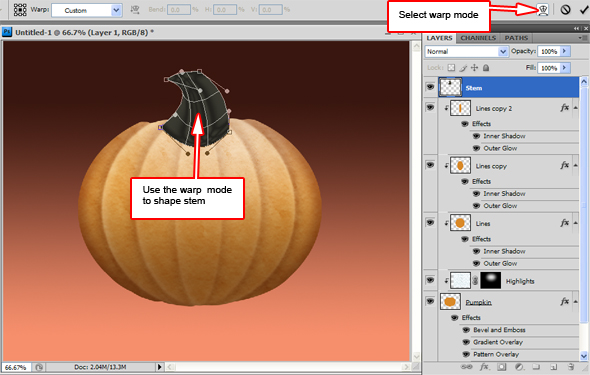
Press Cmd/Ctrl+T to begin to transform the new ‘Stem’ layer. Select the icon in the top properties bar to switch to the ‘warp’ mode and warp the layer to resemble a pumpkin stem.Step 21: Adding a Top
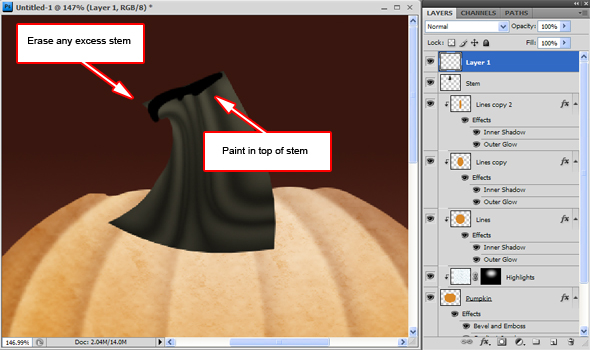
On a new layer, use your Brush tool to paint in the top of the stem, using a darker color. I used black for illustrative purposes. You do not need to make it this dark.Step 22: Finishing the Stem
On the layer that has the top of the stem painted in, add the following effects:Step 23: Adding Shadows
Create a new layer below the ‘Stem’ layer and name its ‘Shadows’. Set it to Multiply and use the Elliptical Marquee tool to add some shadows to the bottom of the pumpkin.Step 24: Burning the Base
Use the Burn tool (or any other method you like) to add some shadows on the base of the pumpkin:Step 25: Merging a Copy
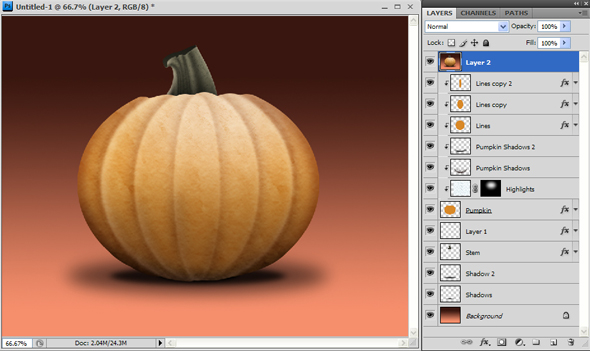
Select all Layers and press Cmd+Opt+Shift+E (Ctrl+Alt+Shift+E) to merge a copy of all layers. This will preserve all of our work, and give us a merged copy to work with.Step 26: Finishing Effect
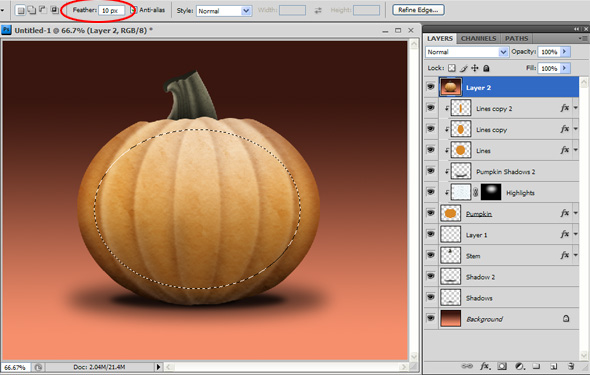
Use the Elliptical Marquee tool with a 10px Feather and select the center of the pumpkin.Step 27: The Final Image
 Previous Article


